5-Minute Pasta Recipe: Quick, Baby-Friendly & Spinach-Infused!
Looking for a quick pasta recipe that not only satisfies your taste buds but also packs a nutritional punch? Dive into our 5-minute pasta – a baby-friendly pasta that stars spinach, offering a variety of health benefits.
Let's imagine a warm and soft garlic-smelling bread. Or do not dream! Here is a recipe that will blow your mind; Cheesy Tangzhong Garlic Bread.
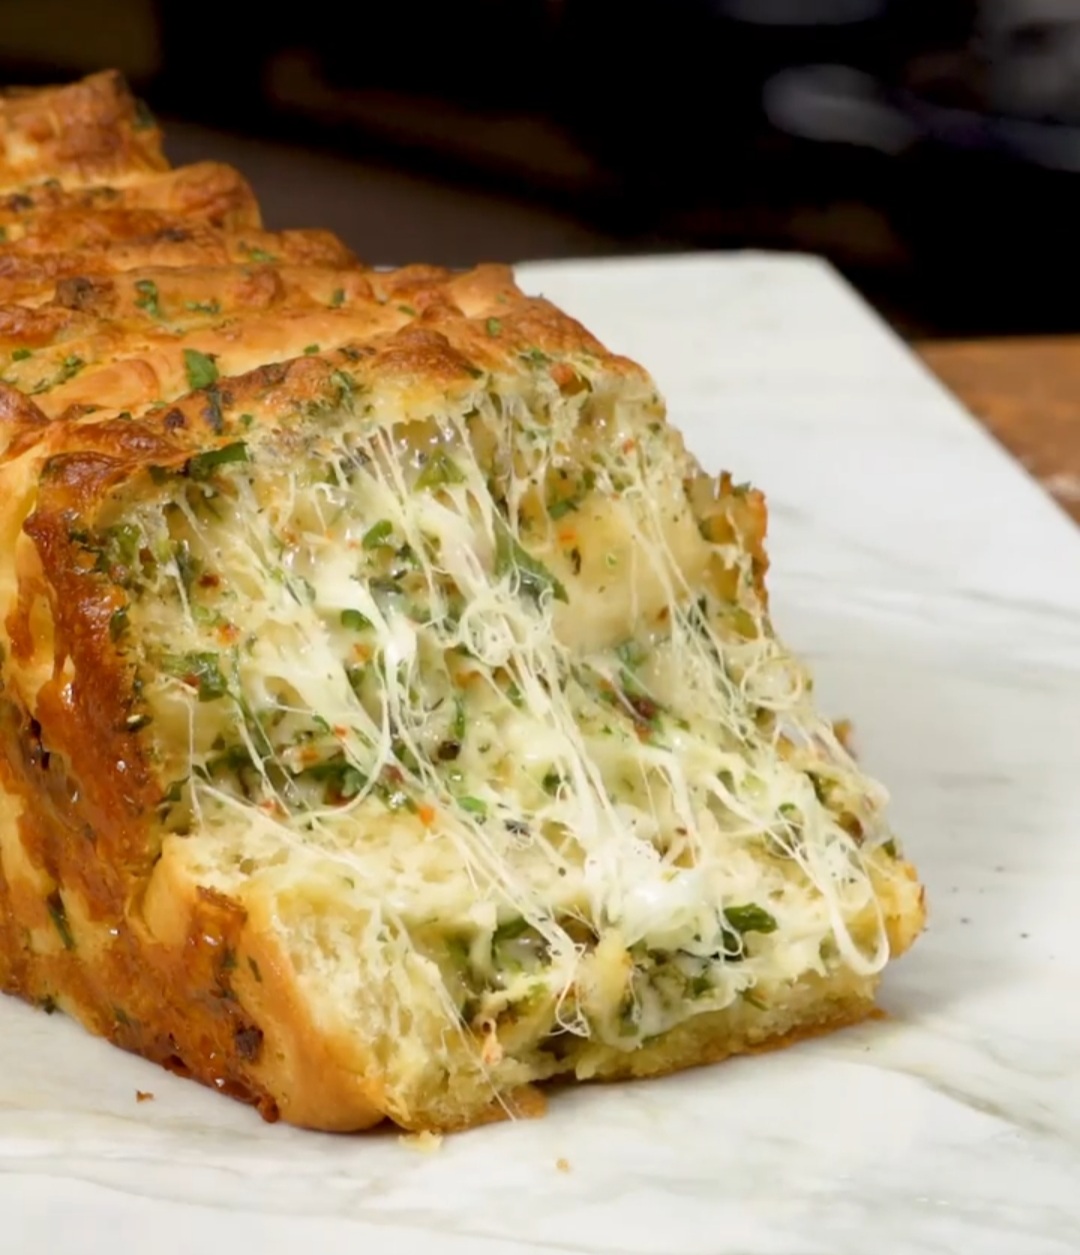
Cheesy Tangzhong Garlic Bread
Let's imagine a warm and soft garlic-smelling bread. Or do not dream! Here is a recipe that will blow your mind; Cheesy Tangzhong Garlic Bread!
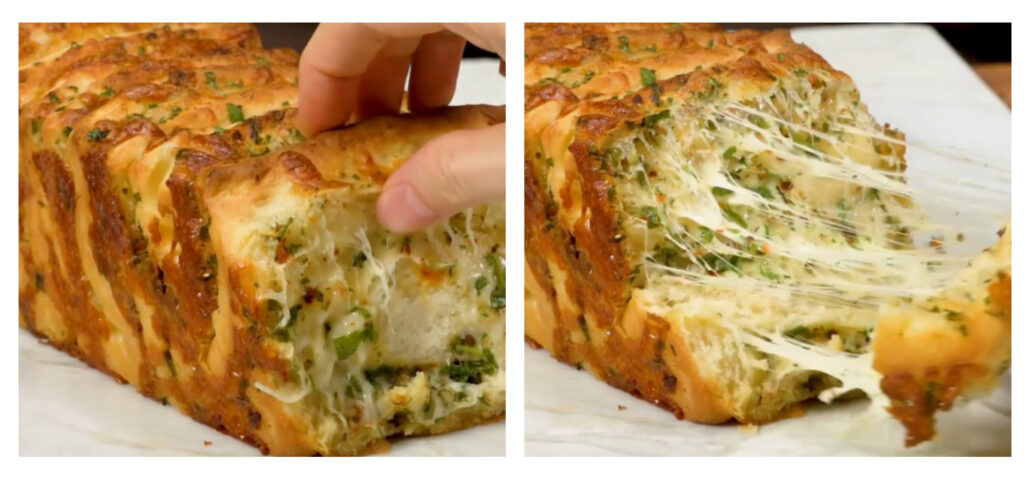
Tangzhong is the name of a technique used in Japanese cuisine to make soft yeast dough. This technique allows the bread to be softer. Don't worry about classic garlic bread. Because Cheesy Tangzhong Garlic Bread is far beyond the classic taste. First of all, it does not resemble any bread in shape. Between each layer of dough is buttered garlic, spices and cheddar cheese.
Garlic bread slices are a flavor that even those who don't like bread and garlic will want to eat. You can serve it with any kind of meal or serve it with extra flavors at tea time. You can also choose this delicious recipe, which is one of the distinguished examples of Mediterranean cuisine, as a snack.
There is almost no recipe in which garlic is added and it is not tasty. However, this time, garlic plays the leading role in the garlic bread recipe that we will share shortly! Here are Cheesy Tangzhong Garlic Bread recipe ingredients and instructions with images in every stage!
Cheesy Tangzhong Garlic Bread Ingredients
Instructions
Cut a head of garlic and pour olive oil and salt on it. Wrap it in aluminum foil and bake in the oven at 350 °F for an hour.
Cook the ingredients (bread flour and whole milk) for tangzhong in a pan until it thickens.
In a large bowl, mix the yeast, sugar and warm milk. Add Tangzhong and the rest of the ingredients (bread flour, whole milk, cream cheese, unsalted butter, granulated sugar, salt, yeast and egg) and knead the dough well.
Cover it and leave it in the oven at 120 °F until the dough doubles.
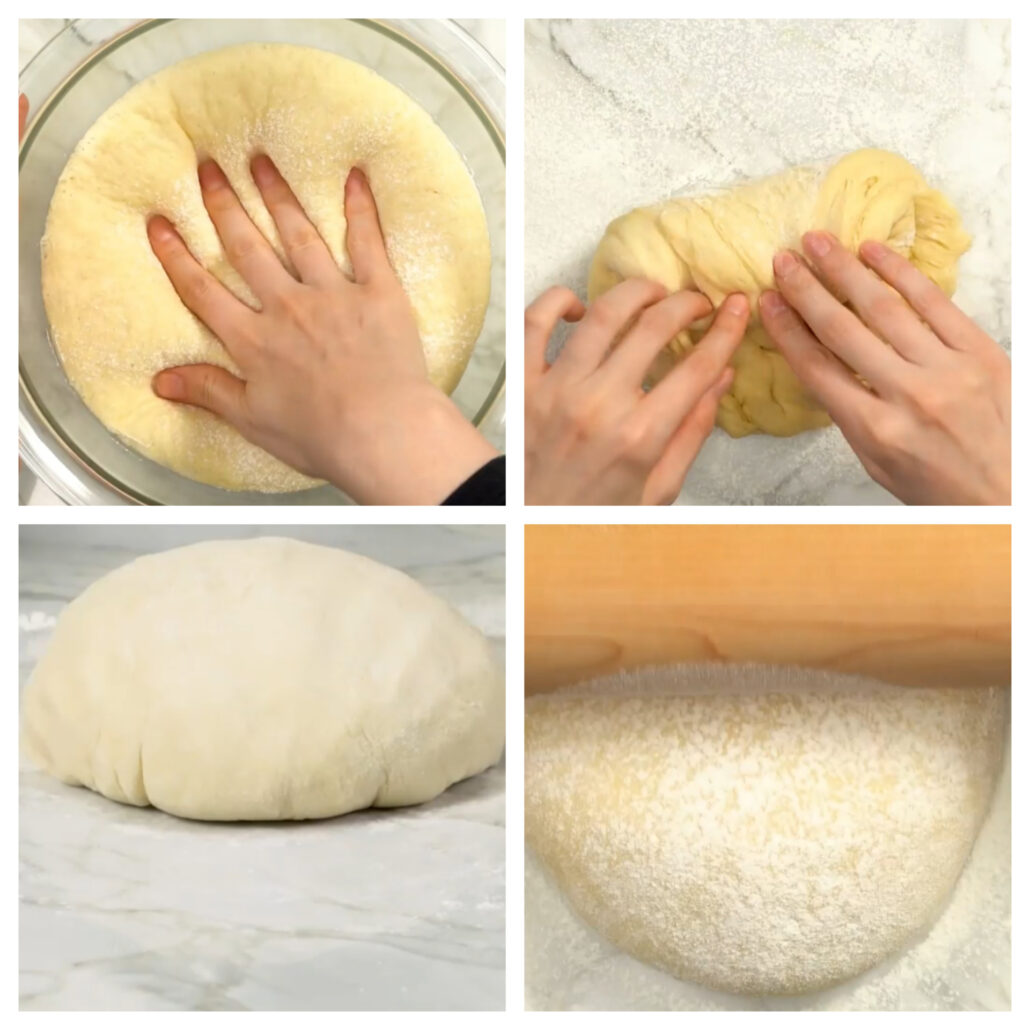
Take the fermented dough on the floured counter and knead it. Roll out the dough to medium thickness with the help of a rolling pin.
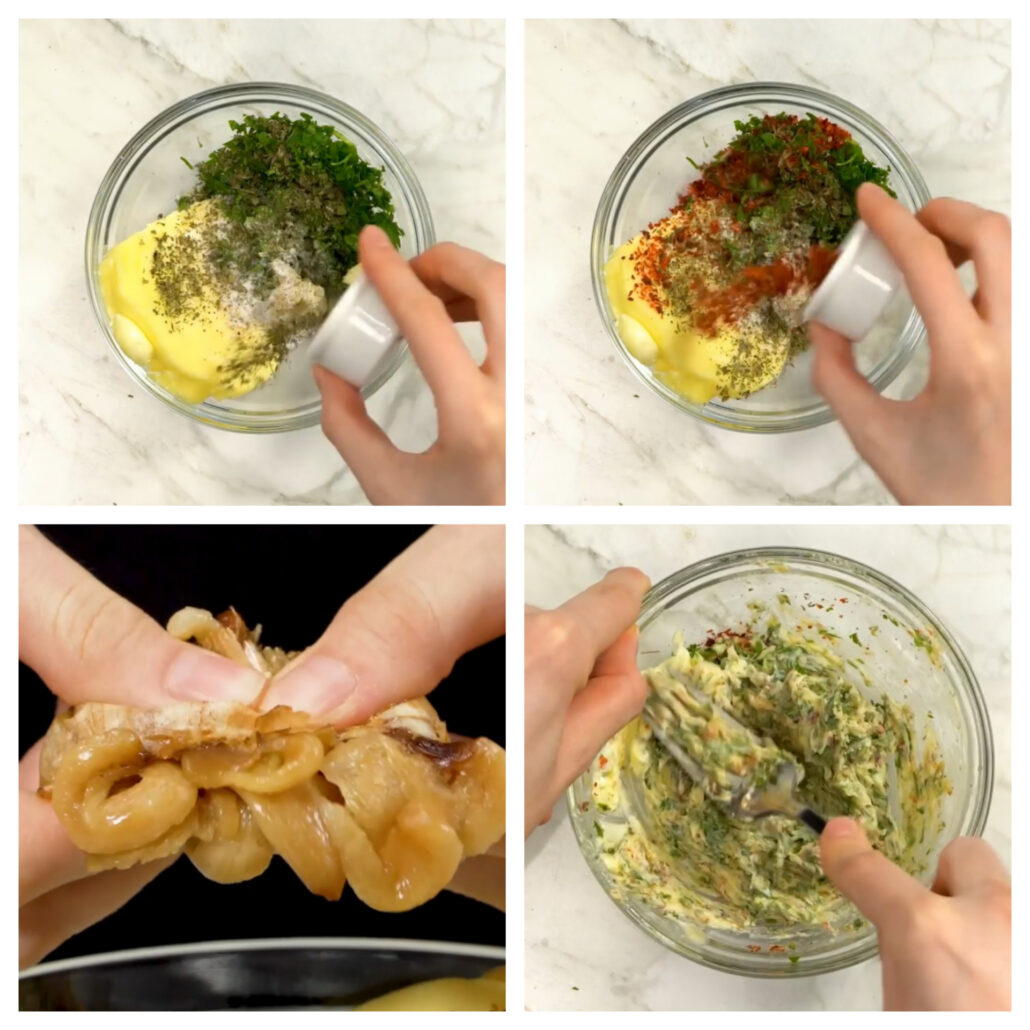
In a separate bowl, mix all the ingredients (baked garlic, grated cheddar cheese, parsley, butter, salt, black pepper, oregano and paprika) for the garlic butter.
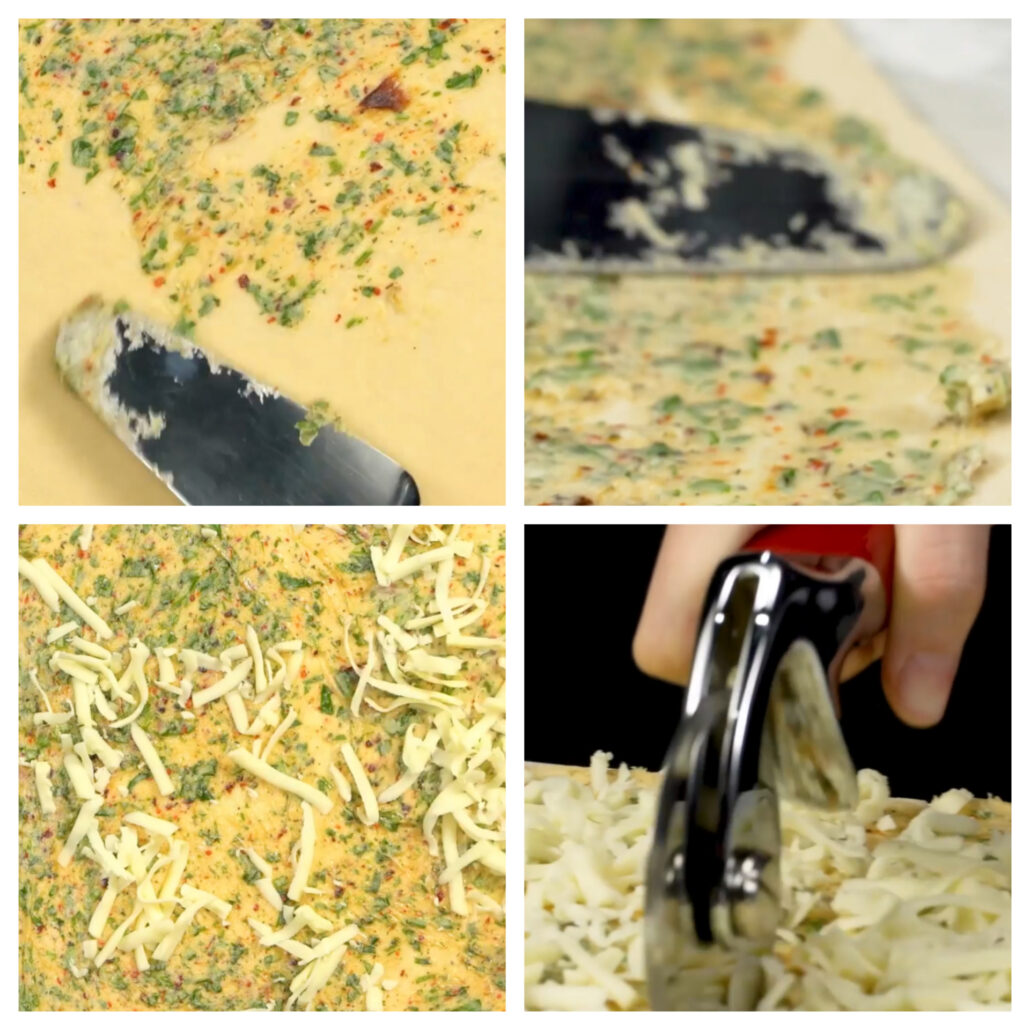
Spread this mixture evenly all over the rolled dough and sprinkle the cheddar cheese on it. Divide the dough into equal parts with a knife.
When you reach a sufficient number of slices according to the size of your loaf pan, put them on top of each other and place them in the loaf pan vertically.
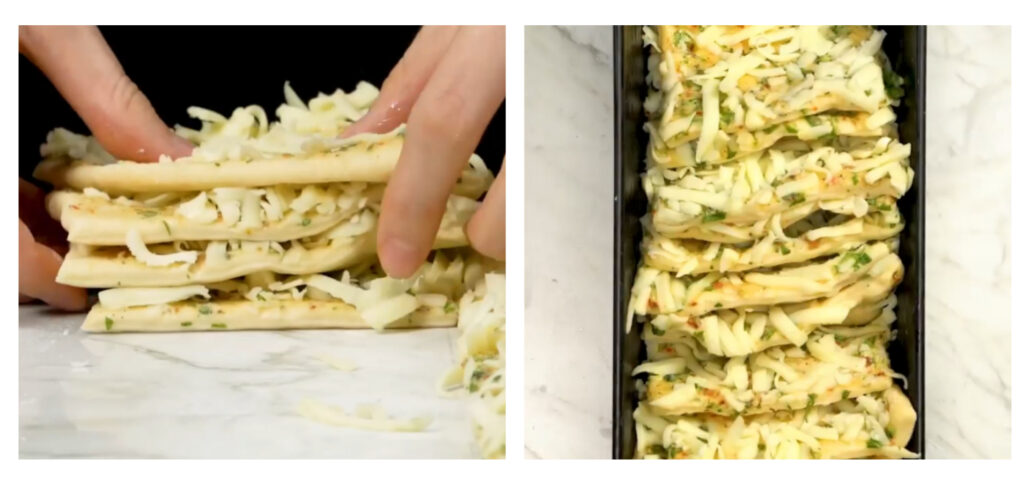
Bake in a preheated 350 °F oven for 20-25 minutes.
Enjoy the warm and aromatic Cheesy Tangzhong Garlic Bread!
Ingredients
Directions
Cut a head of garlic and pour olive oil and salt on it. Wrap it in aluminum foil and bake in the oven at 350 °F for an hour.
Cook the ingredients (bread flour and whole milk) for tangzhong in a pan until it thickens.
In a large bowl, mix the yeast, sugar and warm milk. Add Tangzhong and the rest of the ingredients (bread flour, whole milk, cream cheese, unsalted butter, granulated sugar, salt, yeast and egg) and knead the dough well.
Cover it and leave it in the oven at 120 °F until the dough doubles.
Take the fermented dough on the floured counter and knead it. Roll out the dough to medium thickness with the help of a rolling pin.

In a separate bowl, mix all the ingredients (baked garlic, grated cheddar cheese, parsley, butter, salt, black pepper, oregano and paprika) for the garlic butter.

Spread this mixture evenly all over the rolled dough and sprinkle the cheddar cheese on it. Divide the dough into equal parts with a knife.

When you reach a sufficient number of slices according to the size of your loaf pan, put them on top of each other and place them in the loaf pan vertically.

Bake in a preheated 350 °F oven for 20-25 minutes.
Enjoy the warm and aromatic Cheesy Tangzhong Garlic Bread!

Notes
Recipe Source: Lokma


Leave a Reply