5-Minute Pasta Recipe: Quick, Baby-Friendly & Spinach-Infused!
Looking for a quick pasta recipe that not only satisfies your taste buds but also packs a nutritional punch? Dive into our 5-minute pasta – a baby-friendly pasta that stars spinach, offering a variety of health benefits.
Strained kadaifs blended with lots of butter after they are rolled out, unsalted fresh mozzarella, crispy fried kadaif strings in contact with fire... Which dessert do you think has all the beauty in its recipe? Of course, one of the most delicious desserts with sherbet; Traditional Crispy Kunafa Dessert!
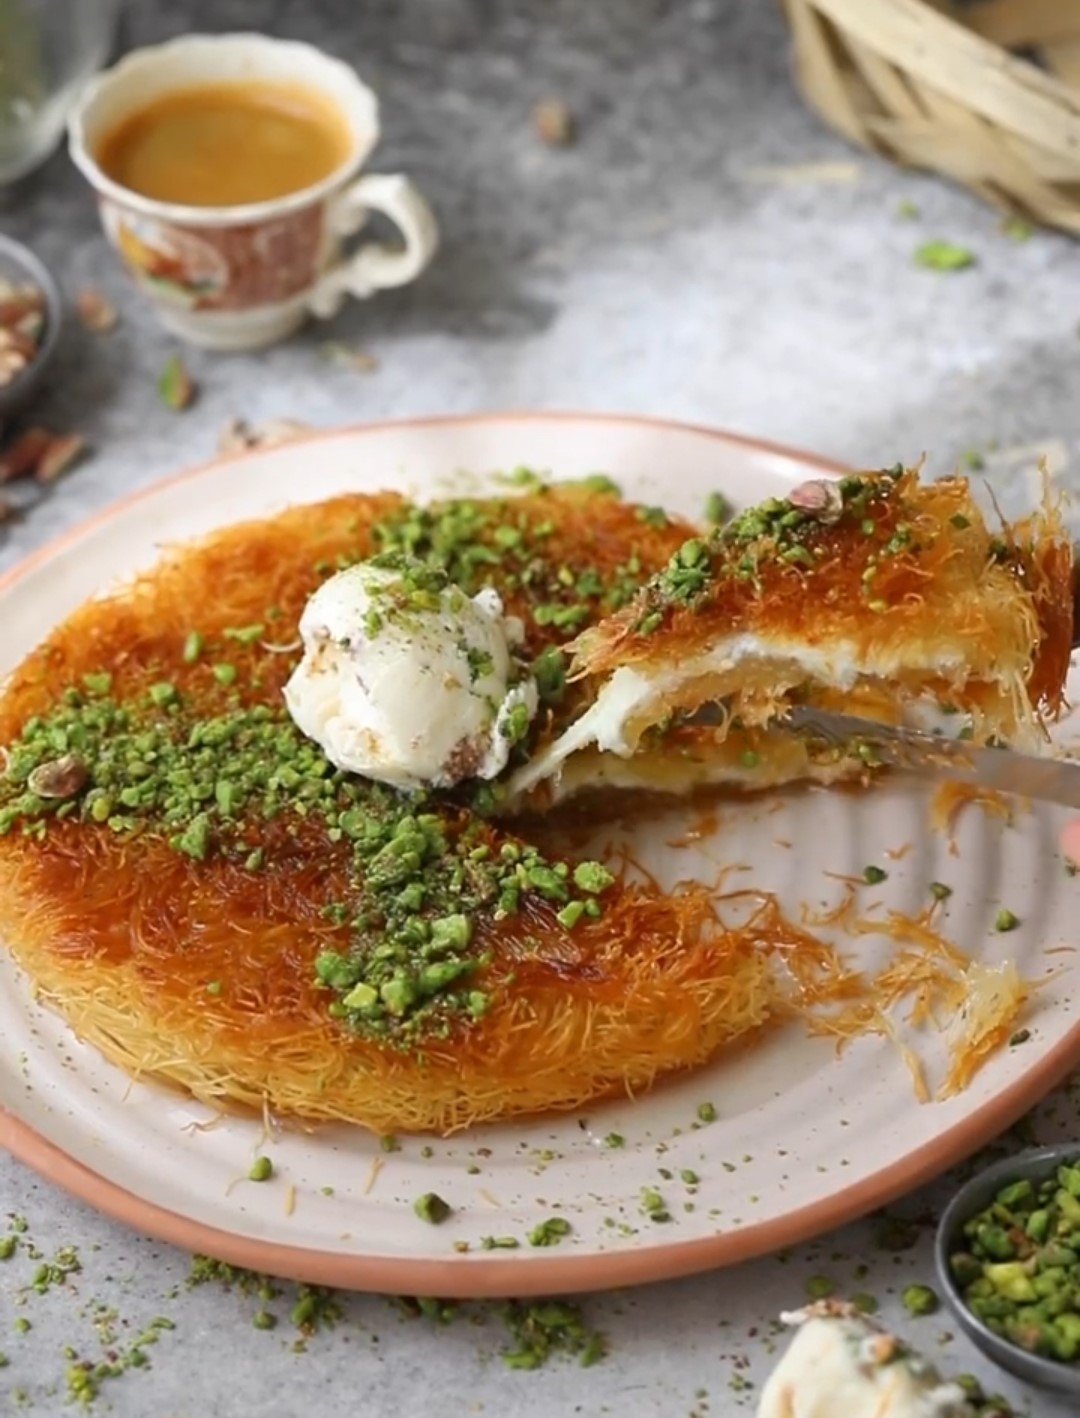
Traditional Crispy Kunafa Dessert
Strained kadaifs blended with lots of butter after they are rolled out, unsalted fresh mozzarella, crispy fried kadaif strings in contact with fire... Which dessert do you think has all the beauty in its recipe? Of course, one of the most delicious desserts with sherbet; Traditional Crispy Kunafa Dessert!
Traditionally, kunafa is prepared in its own special tray with unsalted kunafa cheese. The kunafa, which is cooked by slowly turning over the fire, is turned upside down so that both sides are fried. To make it at home, you can use fresh mozzarella as an alternative to kunafa cheese, and a small thick pan as an alternative to the tray.
Kunafa is the dessert that your eyes seek after a delicious kebab or grilled meat! Sometimes you share a portion with your friend after a heavy meal, and sometimes you can't stop yourself and eat it all! Today, we will tell you how to make kunafa, which is one of the most popular and well-known recipes of traditional desserts. If you find it a little difficult to get the consistency of kunafa sherbet or to find kunafa cheese, don't worry, the most practical version of the kunafa recipe is with you!
Some of you may be surprised that the sherbet dessert has cheese in it. But do not overlook one point. Kunafa cheese must be unsalted. Thus, when combined with sugar, a legendary flavor will emerge instead of an unbalanced flavor. In addition, the fresh mozzarella melting during cooking will allow the cheese flavor to disperse in your mouth while you eat it.
While serving, the most important point is the temperature of the sherbet and how to pour it. You can sprinkle pistachios for decoration, so you can increase both its taste and decoration. You can also access the ideal temperature of the sherbet and the details of its usage.
When and How to Pour Kunafa Sherbet?
The most important point of the kunafa recipe at home is actually the sherbet of kunafa! Before you start making the kunafa dessert, you need to prepare the sherbet and leave it to cool on the side. After both sides of the kunafa are sufficiently fried, the sherbet that gives its flavor to the kunafa is poured when it reaches room temperature.
Traditional Crispy Kunafa Dessert Ingredients
Instructions
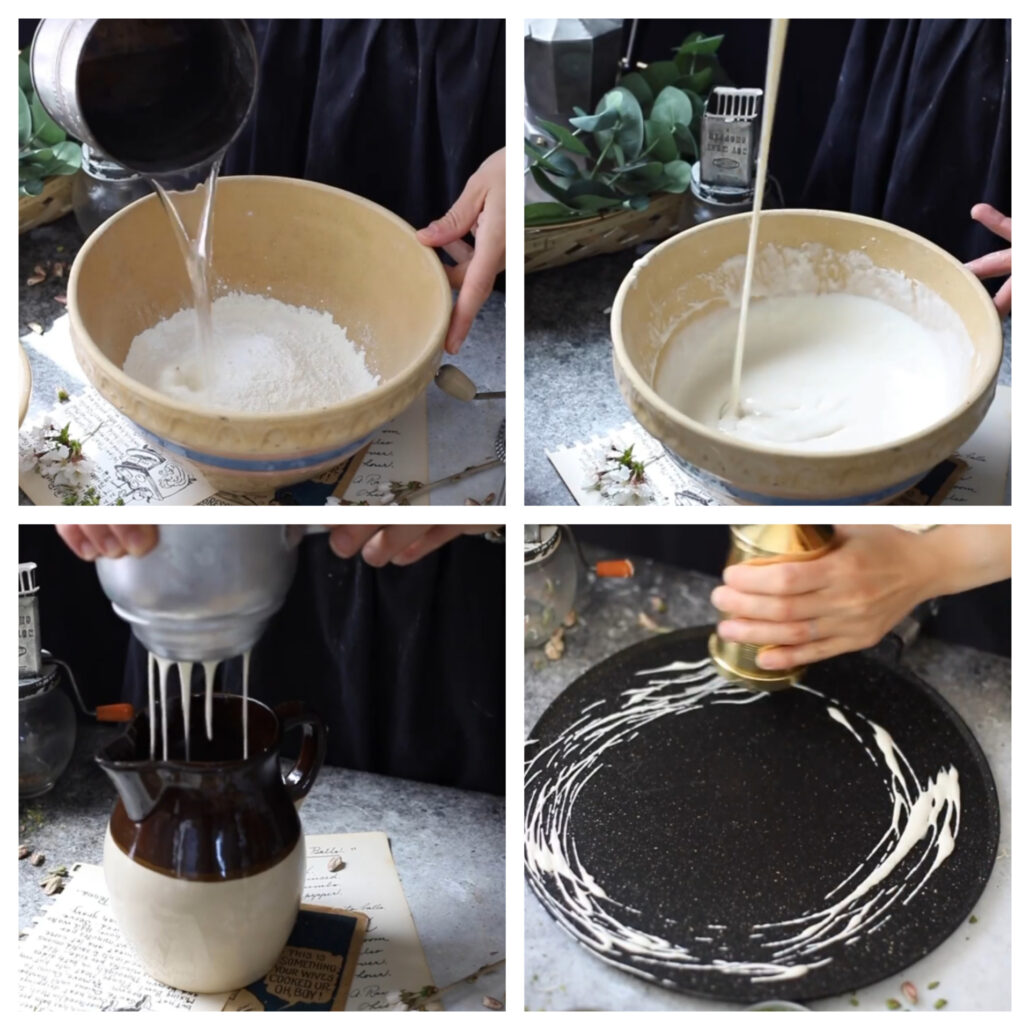
In a large bowl, add flour and cornstarch, salt, and sugar, mix well. Pour the water, oil, and vinegar and mix until the mixture is smooth for 4-5 minutes using a hand or electric mixer. Transfer the batter to a noodle maker or a piping bag. Heat a non-stick pan over medium heat and pipe the batter over the hot pan and cook for 30 seconds.
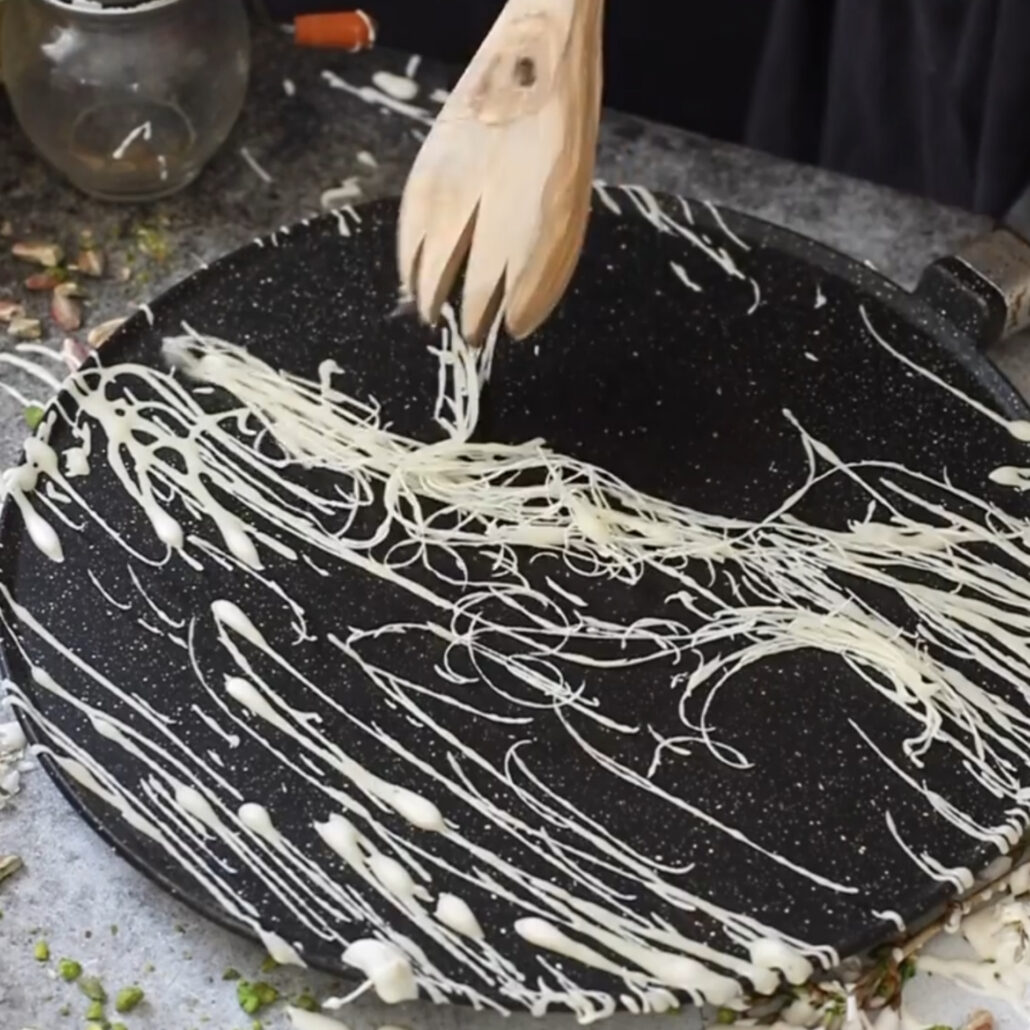
Once the dough peels off of the pan, remove the cooked dough into a bowl using a spatula. Repeat this process with the remaining batter.
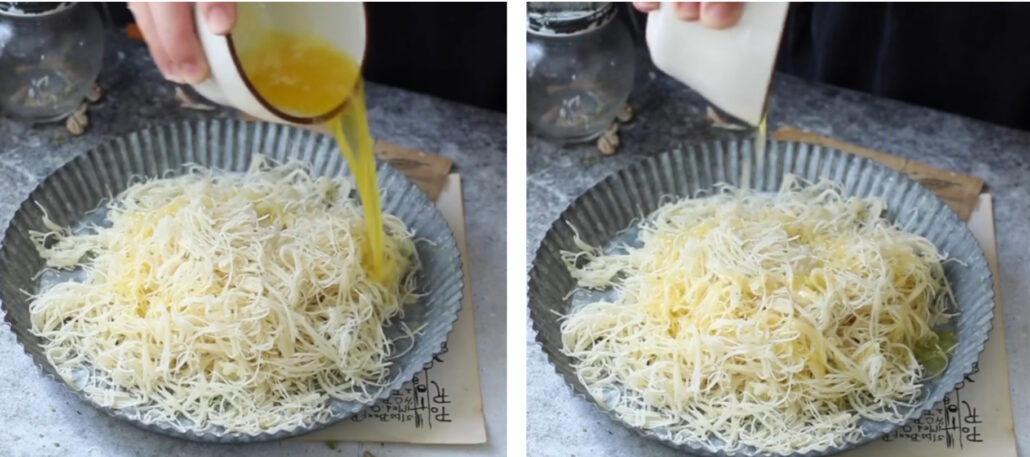
After taking the kadaifs to the plate, blend them with butter. This process will increase the flavor of the kadaif and make it more stringy in your mouth.
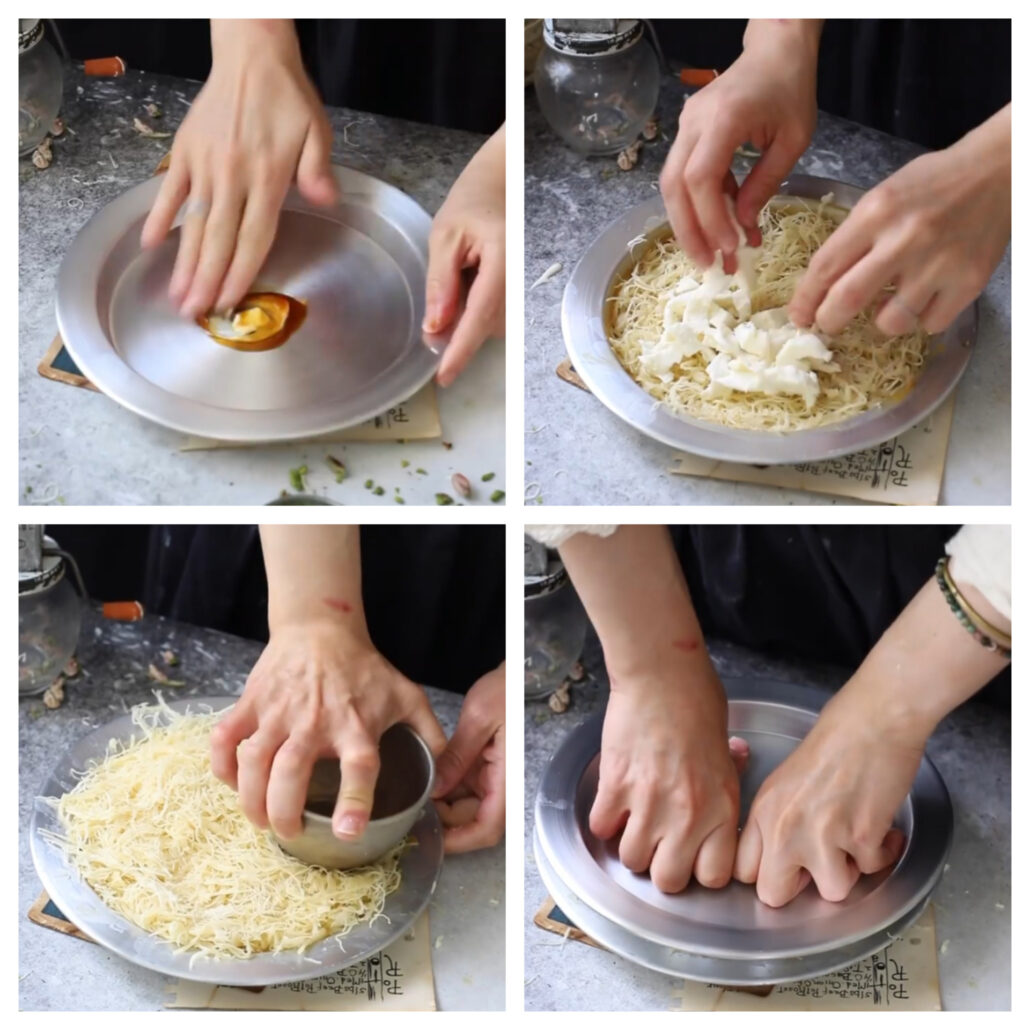
Before laying the kadaif on the baking tray, cover the tray with butter and a spoonful of molasses to prevent it from sticking to the tray. Then lay half of the kunafa dough on the bottom of the kunafa plate. Sprinkle cheese on kunafa dough and sprinkle the remaining kunafa dough on top. Press the kunafa with the help of a plate. In this way, you will ensure that the kunafa dough becomes firm and does not fall apart.
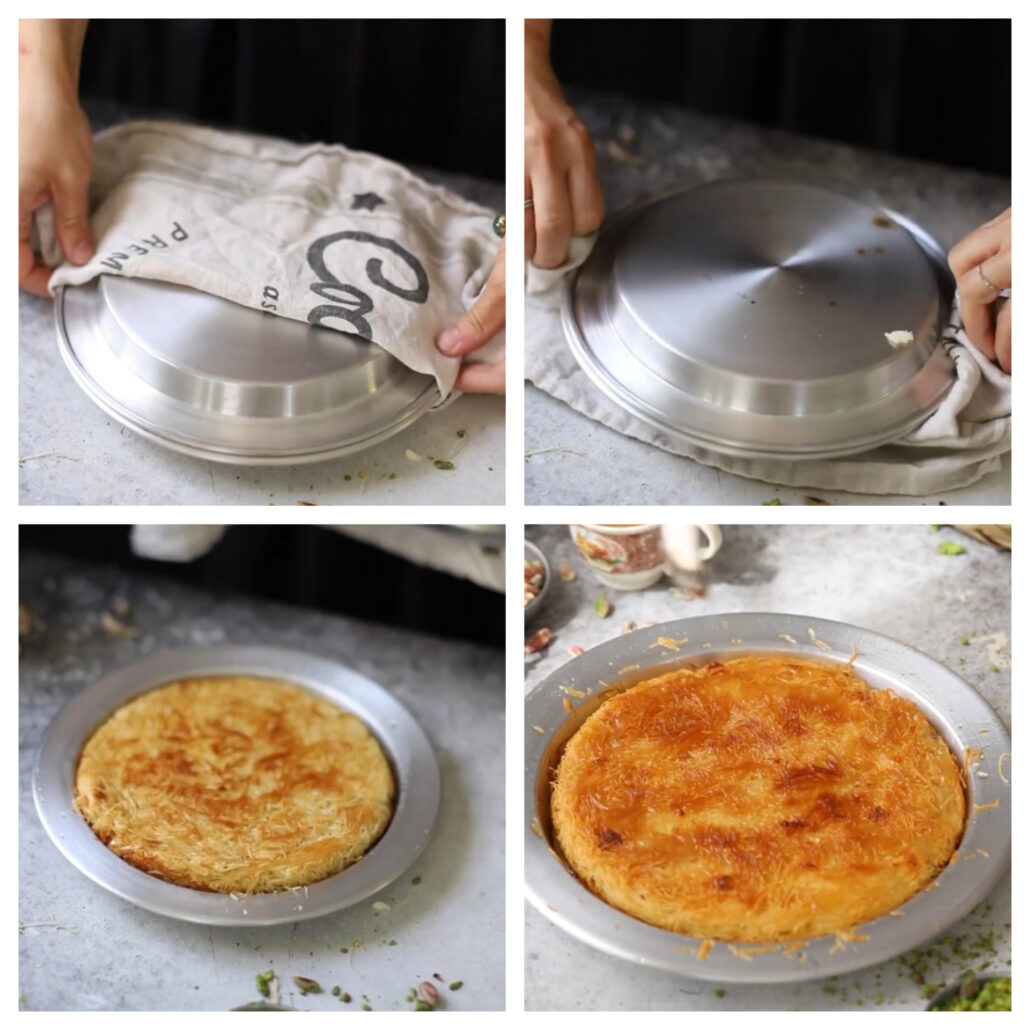
It is cooked by turning the tray on the stove on the lowest heat. When you are sure that the gold is completely browned, the tray is turned upside down on a plate or tray and the inside of the second tray is also oiled so that the other side is cooked. The künefe is placed on the tray with the fried part on top and the bottom is fried. Thus, both sides are fried.
In a saucepan, add the sugar, water, salt, and lemon slice, heat over medium-high, and bring to a boil. Then, reduce the heat to medium-low and simmer it for 10-12 minutes. Remove the sherbet from the heat and let it cool at room temperature.
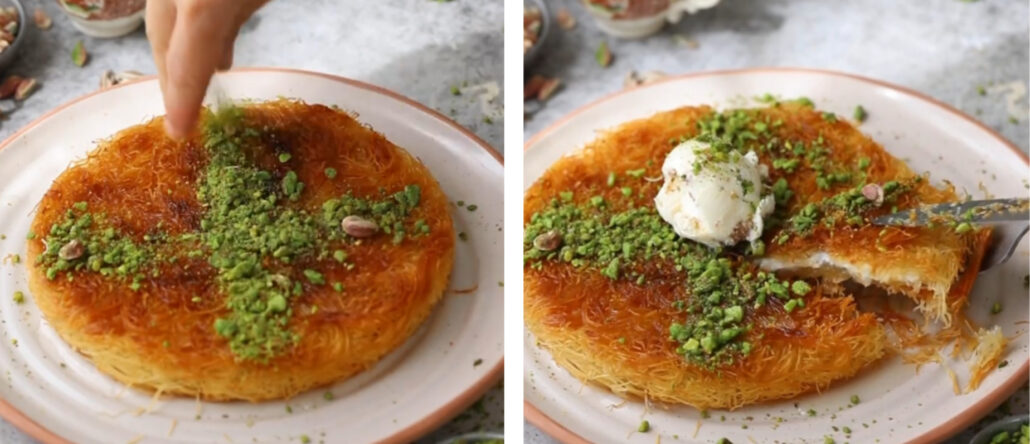
Slowly pour the sherbet that comes to room temperature to the cooked kunafa, wet all over it. After waiting for it to absorb into the sherbet, decorate it by sprinkling pistachios on it.
Ingredients
Directions
In a large bowl, add flour and cornstarch, salt, and sugar, mix well. Pour the water, oil, and vinegar and mix until the mixture is smooth for 4-5 minutes using a hand or electric mixer. Transfer the batter to a noodle maker or a piping bag. Heat a non-stick pan over medium heat and pipe the batter over the hot pan and cook for 30 seconds.

Once the dough peels off of the pan, remove the cooked dough into a bowl using a spatula. Repeat this process with the remaining batter.

After taking the kadaifs to the plate, blend them with butter. This process will increase the flavor of the kadaif and make it more stringy in your mouth.

Before laying the kadaif on the baking tray, cover the tray with butter and a spoonful of molasses to prevent it from sticking to the tray. Then lay half of the kunafa dough on the bottom of the kunafa plate. Sprinkle cheese on kunafa dough and sprinkle the remaining kunafa dough on top. Press the kunafa with the help of a plate. In this way, you will ensure that the kunafa dough becomes firm and does not fall apart.

It is cooked by turning the tray on the stove on the lowest heat. When you are sure that the gold is completely browned, the tray is turned upside down on a plate or tray and the inside of the second tray is also oiled so that the other side is cooked. The künefe is placed on the tray with the fried part on top and the bottom is fried. Thus, both sides are fried.

In a saucepan, add the sugar, water, salt, and lemon slice, heat over medium-high, and bring to a boil. Then, reduce the heat to medium-low and simmer it for 10-12 minutes. Remove the sherbet from the heat and let it cool at room temperature.
Slowly pour the sherbet that comes to room temperature to the cooked kunafa, wet all over it. After waiting for it to absorb into the sherbet, decorate it by sprinkling pistachios on it.

Notes
Recipe Source: turkuazkitchen


Leave a Reply