5-Minute Pasta Recipe: Quick, Baby-Friendly & Spinach-Infused!
Looking for a quick pasta recipe that not only satisfies your taste buds but also packs a nutritional punch? Dive into our 5-minute pasta – a baby-friendly pasta that stars spinach, offering a variety of health benefits.
If you want to not only drink coffee but also eat, you are at the right address. I can say that coffee is no longer just a beverage, but also the number one flavor of desserts. Here is a legendary recipe for you now; Coffee Flavored Pudding!
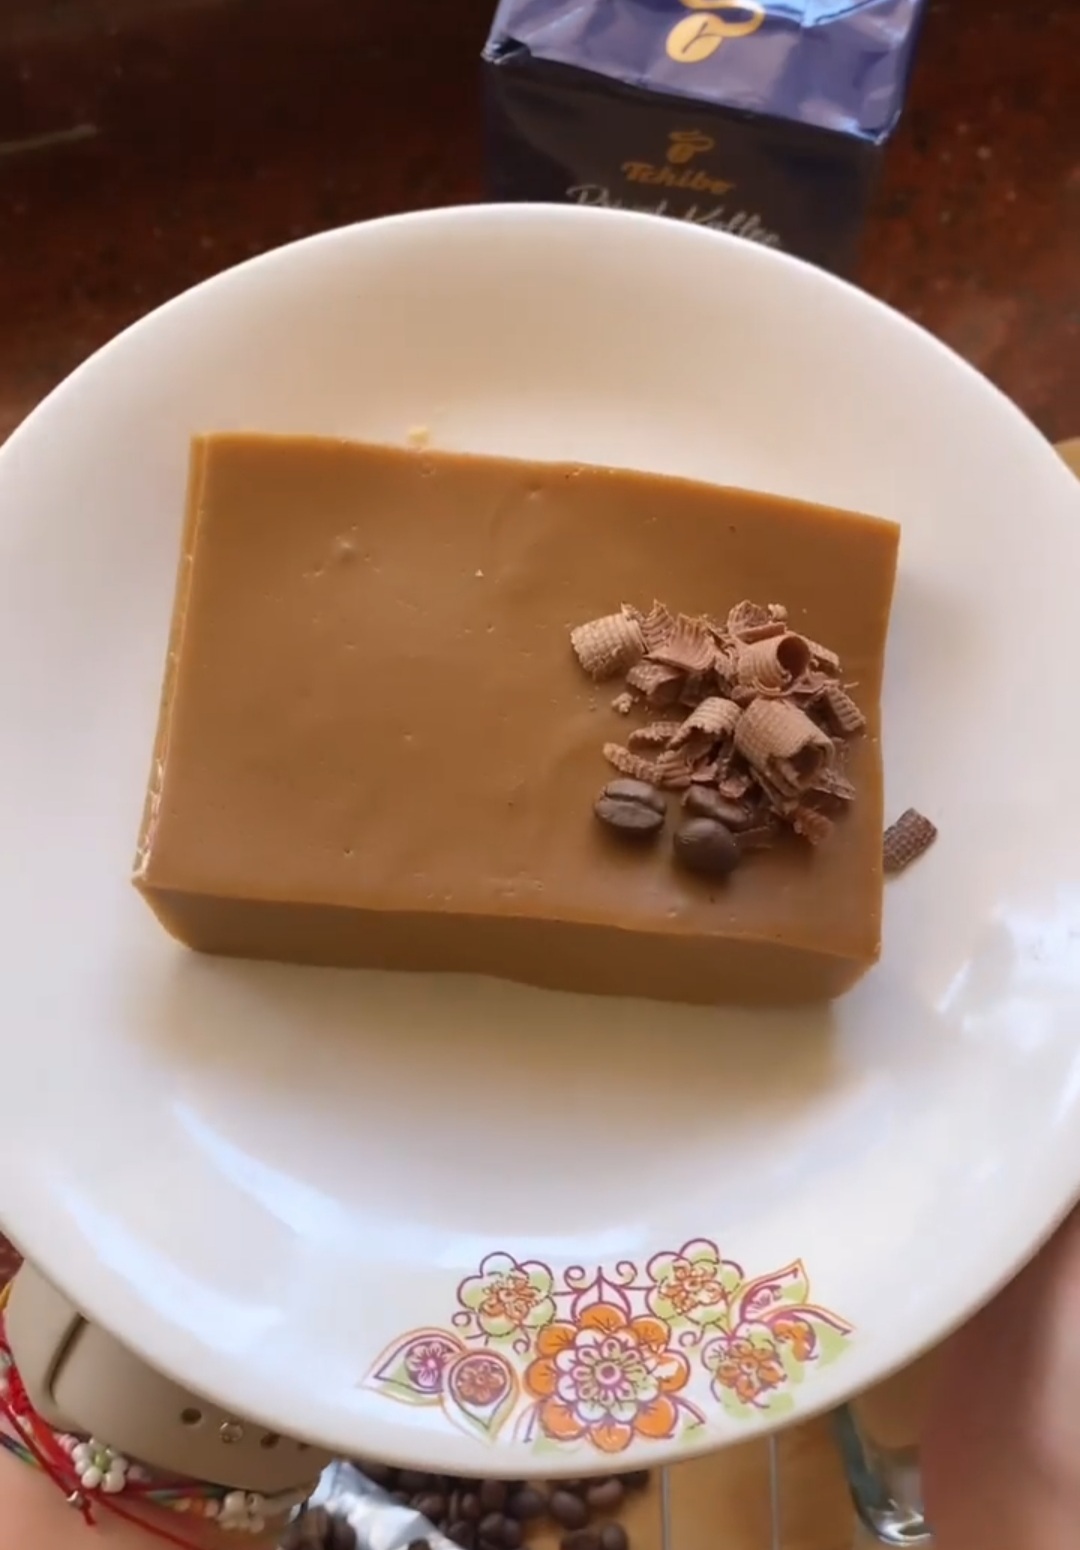
Coffee Flavored Pudding
If you want to not only drink coffee but also eat, you are at the right address. I can say that coffee is no longer just a beverage, but also the number one flavor of desserts. Here is a legendary recipe for you now; Coffee Flavored Pudding!
Is it possible to make very delicious desserts with less ingredients? If you are wondering the answer to this question, you will have to be a little more patient. With its light and refreshing effect, Coffee Flavored Pudding is a perfect summer dessert. Ideal for stealing the hearts of coffee lovers. The harmony of coffee and milk is indisputable, but have you ever eaten coffee-flavored pudding before? If you haven't, this recipe is for you.
I think pudding is one of the lightest and most practical among other dessert varieties. Its preparation in a very short time with few ingredients makes the pudding stand out among other desserts. It's up to you to adjust the amount of coffee. If you want, you can prepare this dessert by using more intense or lighter coffee. Even a spoon of Coffee Flavored Pudding you take will enchant you! Those who start their day with coffee will continue to enjoy coffee with Coffee Flavored Pudding at noon.
If you like to drink coffee without sugar, you can also reduce the amount of sugar you add to the dessert. You can also prepare this recipe with vegan milk. We want to deliver to you an excellent coffee flavored pudding recipe, where you will fully experience the wonderful aroma and smell of coffee, and you cannot stop yourself while eating it. We definitely recommend that you try it.
Coffee Flavored Pudding Ingredients
Instructions
The highlight of this recipe is the coffee. If you are a coffee and dessert addict like me, you will love this dessert. Yes, let's get started now. Instead of adding ground coffee, I grind the coffee beans in the grinder to maximize the coffee aroma. I'll pull some coarse to get the intense flavor. If you do not have a coffee grinder at home and do not want to buy it, you can also use instant ground coffee.
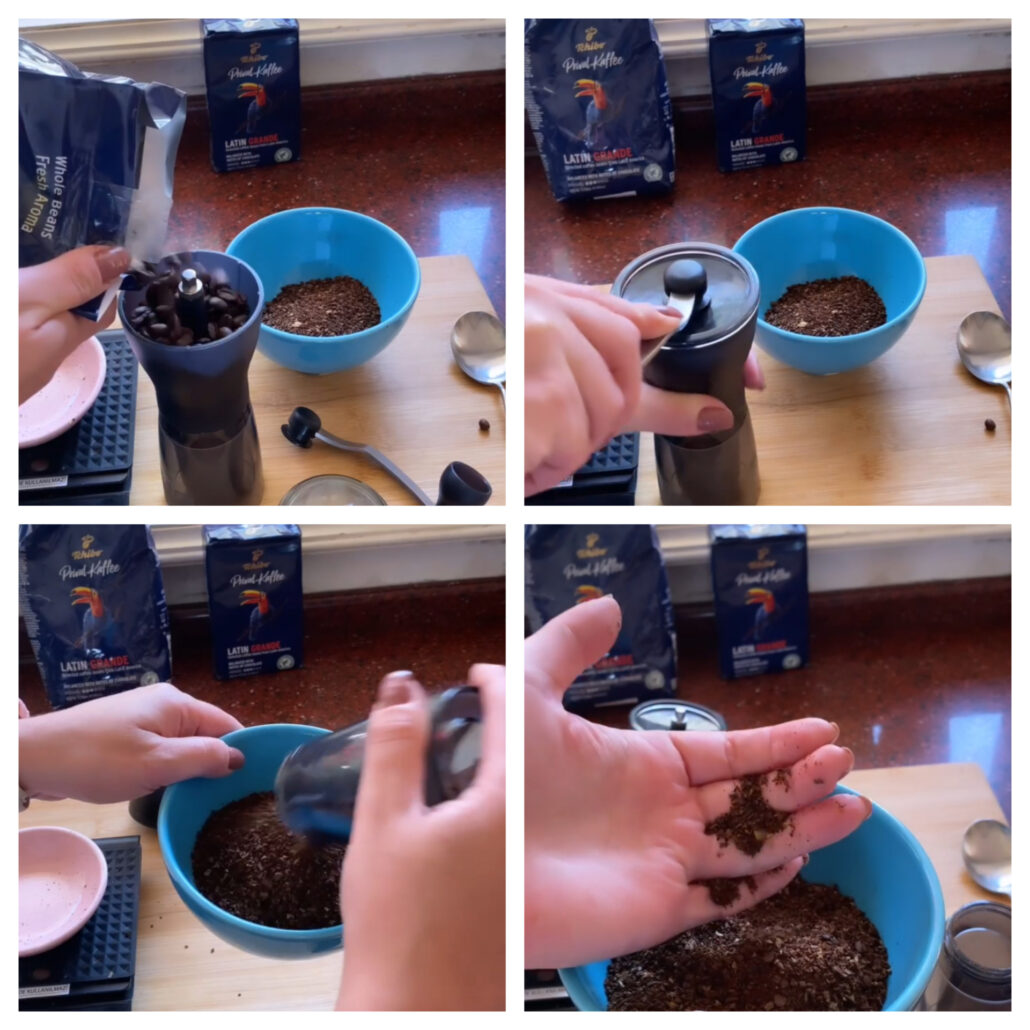
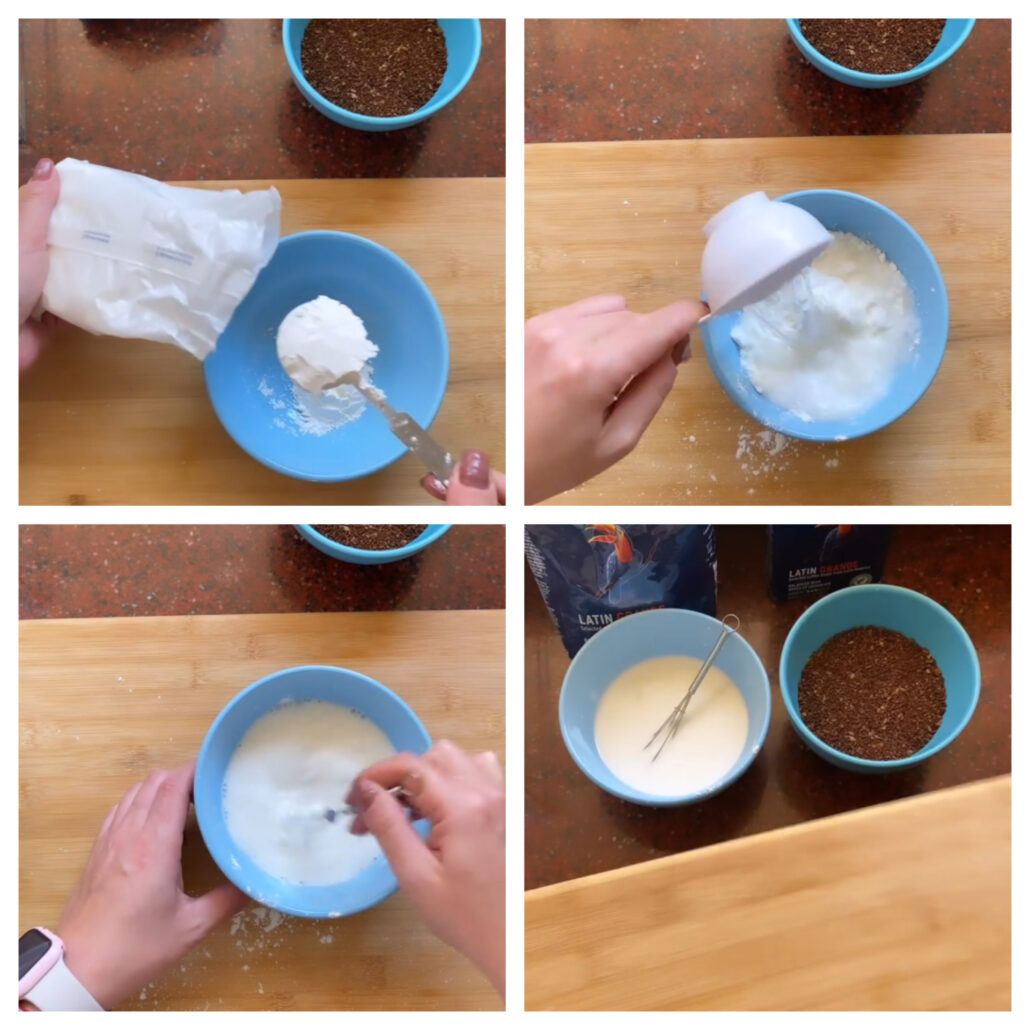
After grinding the coffee, mix the starch and water in a bowl. Set aside.
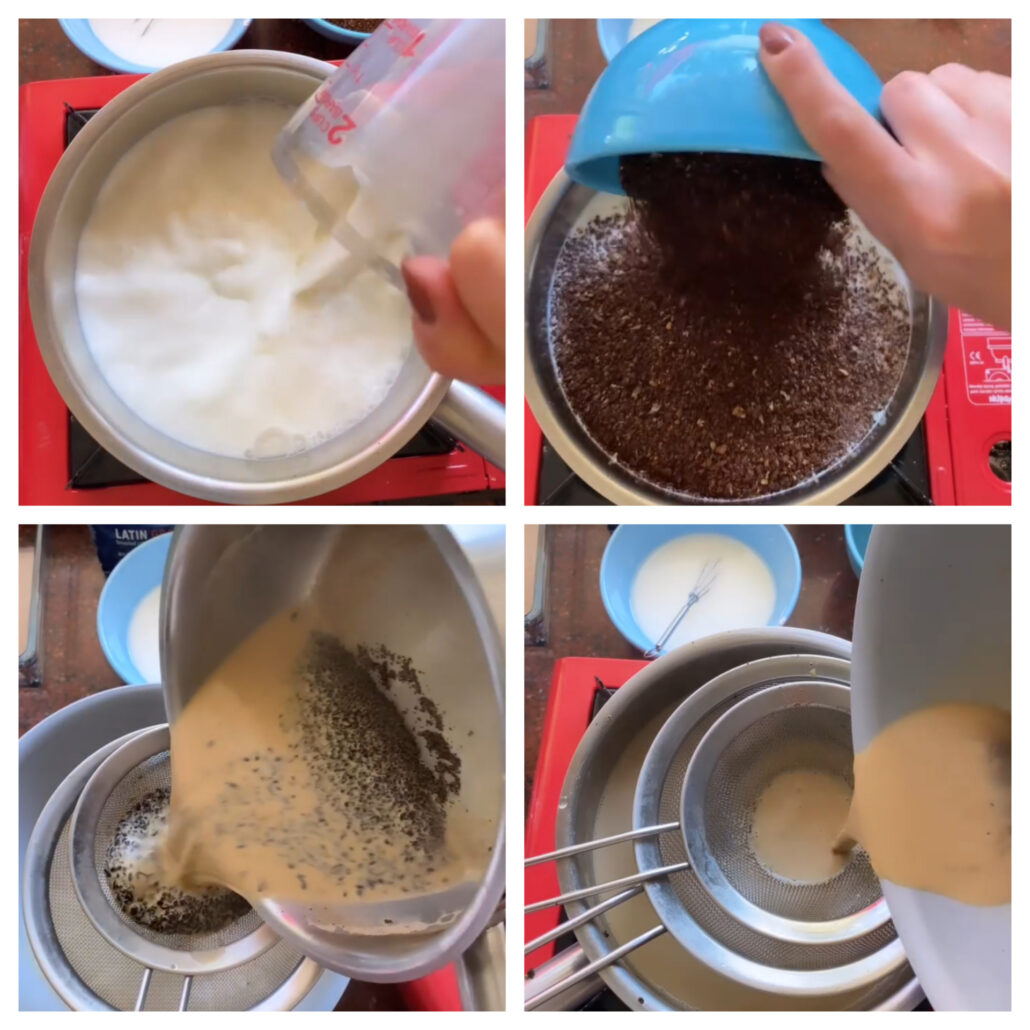
Mix 1 liter of milk and coffee. With this process, we will brew the coffee in milk. In the meantime, be careful not to boil the milk so that it does not taste bitter. After brewing for about 5 minutes, strain the mixture two times. Separate the coffee residues at the bottom during the last filtering.
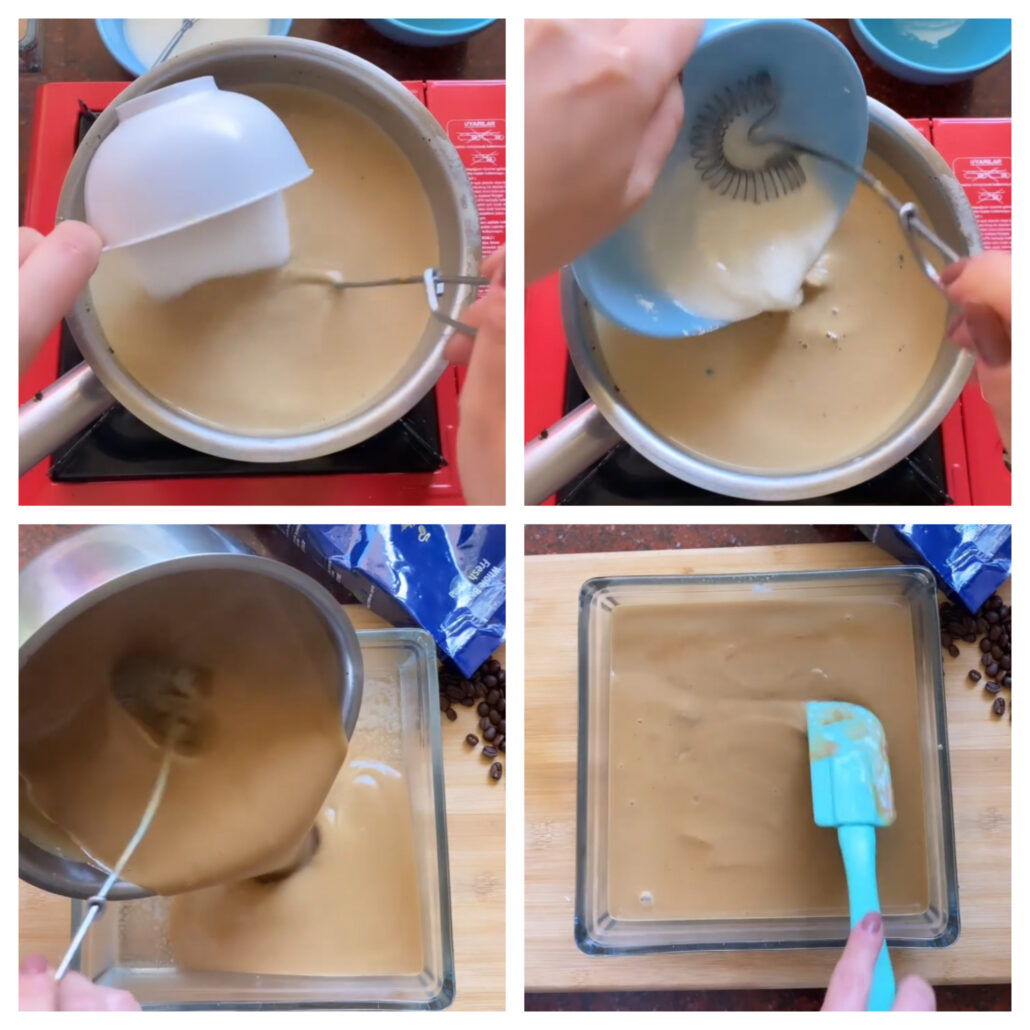
After straining, add starch mixture and sugar to the mixture. Cook on medium heat until it thickens. Pour while hot on your lightly oiled serving plate. When it comes to room temperature, put it in the refrigerator and let it rest for 3-4 hours.
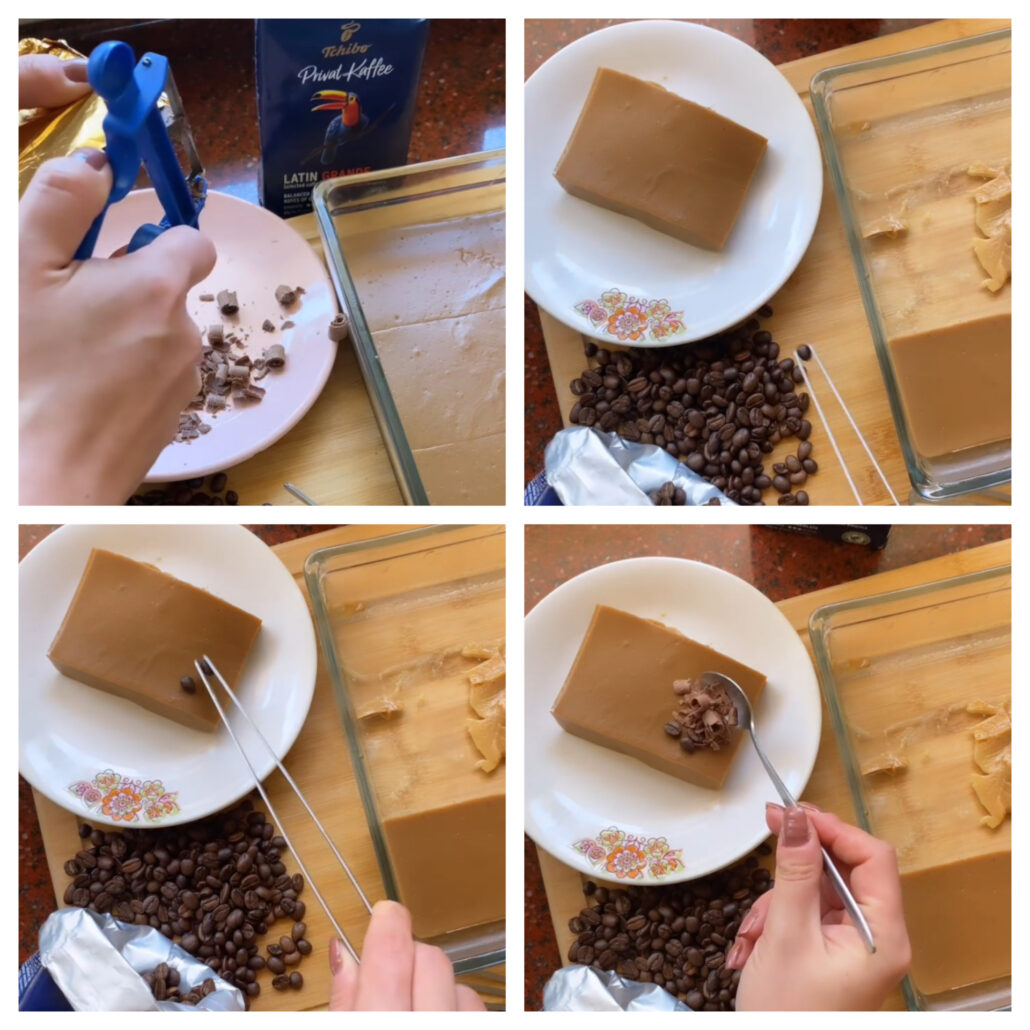
You can shave the chocolate and add coffee beans to decorate it.
Ingredients
Directions
The highlight of this recipe is the coffee. If you are a coffee and dessert addict like me, you will love this dessert. Yes, let's get started now. Instead of adding ground coffee, I grind the coffee beans in the grinder to maximize the coffee aroma. I'll pull some coarse to get the intense flavor. If you do not have a coffee grinder at home and do not want to buy it, you can also use instant ground coffee.

After grinding the coffee, mix the starch and water in a bowl. Set aside.

Mix 1 liter of milk and coffee. With this process, we will brew the coffee in milk. In the meantime, be careful not to boil the milk so that it does not taste bitter. After brewing for about 5 minutes, strain the mixture two times. Separate the coffee residues at the bottom during the last filtering.

After straining, add starch mixture and sugar to the mixture. Cook on medium heat until it thickens. Pour while hot on your lightly oiled serving plate. When it comes to room temperature, put it in the refrigerator and let it rest for 3-4 hours.

You can shave the chocolate and add coffee beans to decorate it.

Notes
Recipe Source: berraque




Leave a Reply